
🛠️ Migration to Platform Settings
- Intro
- What's Changing and Why?
- Features:
Intro
Atobi is moving to a modern backend infrastructure — and with it comes a significantly more powerful way to manage your platform. This update brings a fully rebuilt administration experience through Platform Settings, designed to support the kinds of organizational complexity that growing retail and field operations actually deal with: district managers overseeing multiple stores, field representatives with region-specific responsibilities, multi-brand or franchise structures, and more.
The new Platform Settings replaces the old admin interface and introduces a range of new capabilities for structuring your locations, users, and micro-targeting with more detailed audiences. You can now model your organization in much greater detail — grouping locations under organizations, clustering them into districts, categorizing them by type, and enriching them with addresses. Roles and permissions have also been rebuilt from the ground up, giving you precise control over what each user can see and do across the platform.
We know that migrations require planning. We won't move your platform to the new system without first agreeing on a date and timeline with you. When you're ready, we'll work with you to make the transition as smooth as possible.
What’s Changing and Why?
The core of the change is straightforward: after your migration, all admin features that currently live in the old admin interface will move to Platform Settings inside the Atobi web app. Day-to-day platform usage stays the same — your content, your members, and your existing setup carry over. The difference is where you manage it.
We made this change because the old admin was built for simpler organizational structures, and many of our customers have grown well beyond that. Platform Settings is built to handle the full range of how modern retail and field operations are organized.
Once you're on the new platform, you can continue working exactly as before — or, when the time is right, start taking advantage of the new features. These include:
- Organizations let you group locations under named business entities — such as franchisors, resellers, or operating companies — so your location structure reflects how your business is actually owned and operated.
- Districts let you cluster locations into geographic or operational groupings, making it much easier to manage and target content across a regional structure.
- Enriched Locations can now carry a full range of attributes: a type classification, organization, product categories, address with map coordinates, parent location for hierarchy building, and an external ID for integrations. This makes filtering, targeting, and audience building far more precise.
- Location and Content Categories give you flexible labelling across both locations and content — so you can segment by store type, product focus, or content theme and target accordingly.
- Roles and Permissions have been completely rebuilt. Instead of a fixed set of roles, you can now create custom roles with granular permissions across directory management, content, features, and administration. You can also control whether a role has Local access (limited to assigned locations) or Global access (across the entire platform).
- Flexible Member Responsibilities mean you no longer have to assign members to specific locations directly. Instead, you can define responsible areas more dynamically — and members can be associated with the product categories they sell or manage, opening up more targeted content delivery.
- Audiences have also been significantly expanded. Where you previously could only target members by Profession and Location, you can now build audiences using any combination of Organization, Country, Role, Profession, Location Category, Content Category, District, Division, and specific Locations.
Let’s dive into the details:
1. Organizations
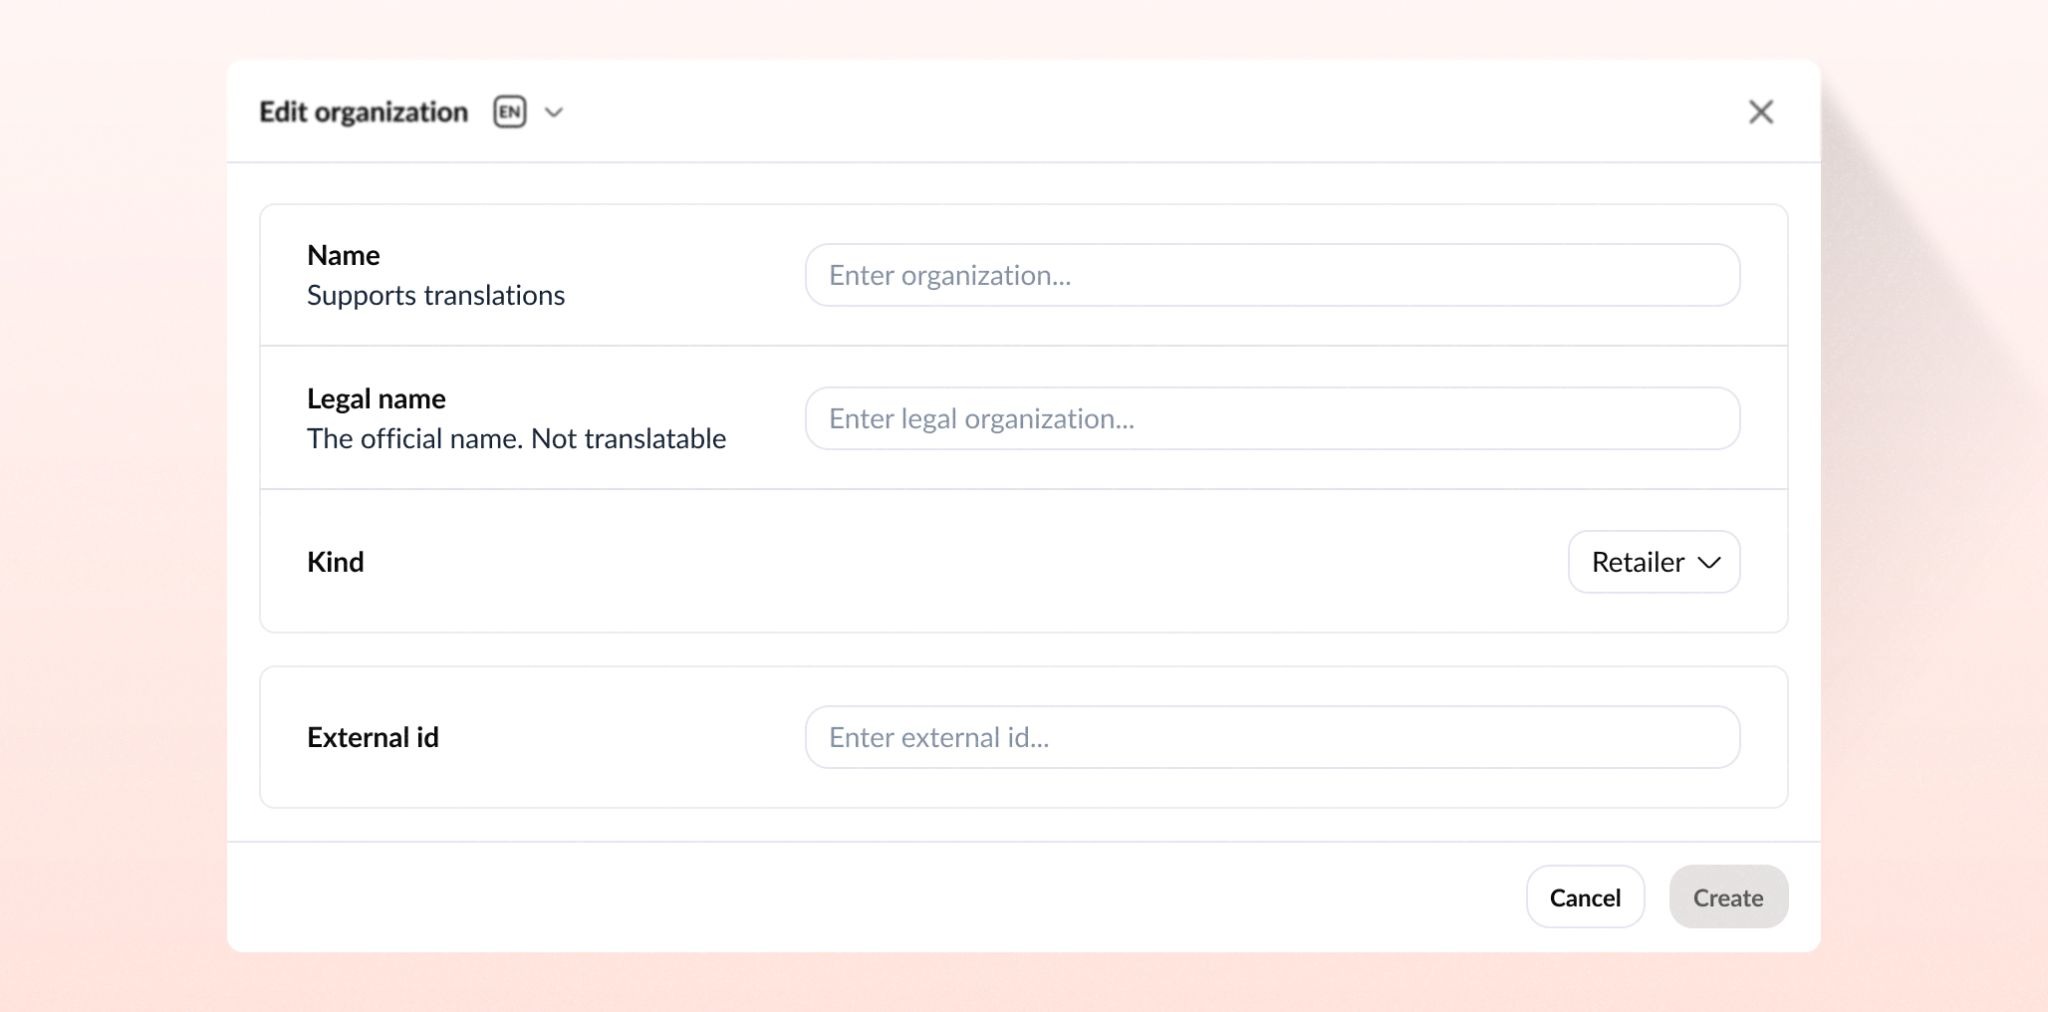
Organizations allow you to group and classify your locations under named entities — such as a franchisor, reseller, or operating company. This makes it easier to structure your platform and filter locations by the business they belong to.
Each organization has a display name (which supports translations for multi-language platforms), a legal name, a type classification (called "Kind"), and an optional external ID for linking to other systems.
Available organization types include: Distributor, Franchise, Logistics, Own and Operated, Operator, Manufacturer, Reseller, Retailer, and Other.
Admins can create, edit, and delete organizations at any time via Platform Settings → Locations → Organizations. When viewing or editing an organization, you can also jump directly to all locations linked to it. Note that an organization cannot be deleted while it still has locations assigned to it — those need to be reassigned first.
The organizations list supports search, sorting, and filtering by type, making it easy to manage even large platform setups.
2. Location Categories
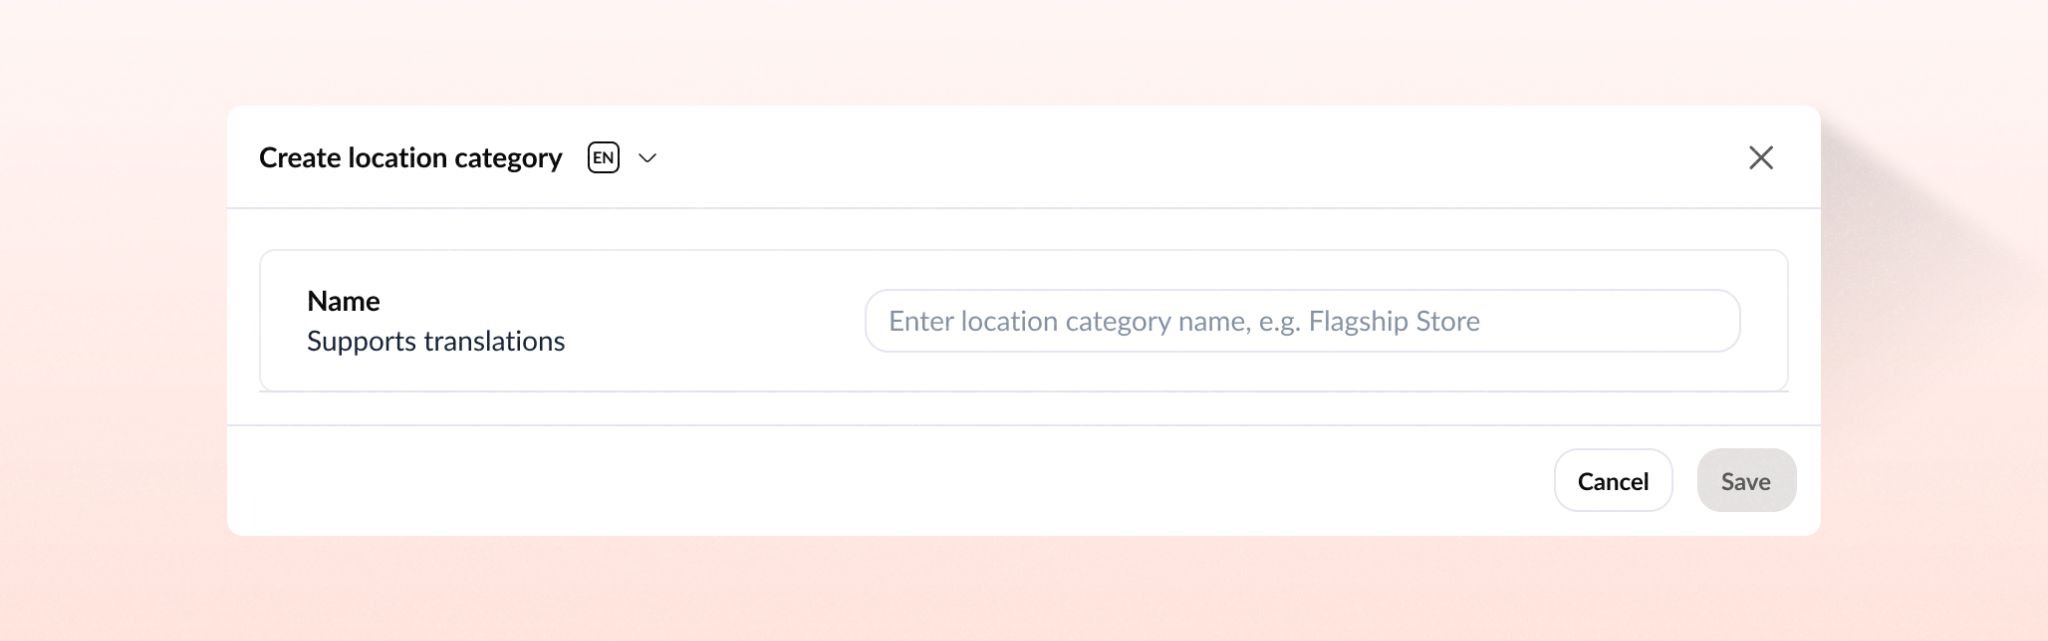
Location Categories are labels you assign to locations to group them by type — for example, Flagship, Outlet, or Wholesale. Once set up, they appear across the platform wherever you need to segment or target specific groups of locations with the right content and tasks.
Note that Location Categories are distinct from Content Categories: the former organise locations by type, while the latter organise articles and content by theme. They live in different parts of Platform Settings.
Location categories can be created and named freely (with translation support for multi-language platforms), edited at any time, and searched or sorted in the list view. Rather than being permanently deleted, categories are archived when no longer needed — keeping the data intact and allowing restoration if required. It's worth noting that archiving a category removes it from any location configurations and targeting rules it was part of, so it's advisable to review impacted locations beforehand.
3. Districts
Districts allow you to group locations — such as stores, warehouses, or regional offices — into meaningful geographic or operational clusters. This makes it easier to manage and target content across your location network. A district is always scoped to a single country, so for cross-country groupings, Audiences would be the more appropriate tool.
Each district has a name (with translation support for multi-language platforms) and a country, and can contain any number of locations. Importantly, each location can only belong to one district at a time — reassigning a location to a new district will automatically remove it from its current one.
Admins can view, edit, and delete districts at any time. Deleting a district removes the grouping only — the individual locations within it are not affected.
When adding locations to a district, you can either select them individually or use Location Categories to bulk-add all locations sharing a given category tag, which is particularly useful for large networks.
4. Content Categories

Content Categories are labels you attach to articles and content to organise them by theme — for example, Summer Season, Price Changes, or Merchandising. Once set up, they are used across the platform to tag content and build targeted audiences, making it easier to deliver the right content to the right people.
It's worth noting the distinction from Location Categories: Content Categories organise content by theme, while Location Categories organise locations by type. They serve different purposes and are found in different parts of Platform Settings.
Content categories can be created and named freely (with translation support for multi-language platforms), edited at any time, and searched or sorted in the list view. Like Location Categories, they are archived rather than permanently deleted when no longer needed, allowing them to be restored if required. Archiving a content category removes it from any content and audience configurations it was part of, so it's advisable to review impacted content beforehand to avoid unintended targeting gaps.
5. Locations
Locations are the physical or logical places your organisation operates from — stores, warehouses, regional offices, countries, and more. They form the foundation of the platform's structure, and are used to target content, build audiences, and organise your workforce.
Each location can be enriched with a range of attributes: a type classification (Store, Warehouse, Region, Country, Area, Flagship Store, Factory Outlet, Regional Office, Urban Store, or Headquarters), one or more Location and Content Categories, a linked Organization, an address with map coordinates, a parent location for building hierarchies, and an optional external ID for integration with other systems. Only the name is required, though completing the type and organization fields is strongly recommended as they drive filtering and audience targeting across the platform.
New locations can be created via an address autofill flow — which pre-populates fields and pins the location on a map — or entered manually. All fields can be edited at any time after creation.
The locations list offers flexible ways to navigate large datasets, with search and filtering by category, organization, district, country, and division. The list can also be displayed in three modes: a standard table view, an interactive map showing all geolocated locations, or a graph to visualise location relationships. Rows can additionally be grouped by address or hierarchy to reflect parent-child structures.
Deleting a location is permanent and removes it from any audiences, content assignments, and member responsibilities it was part of. It's important to reassign any critical data before proceeding, as this action cannot be undone.
Locations are managed under Platform Settings → Locations.
6. Roles & Permissions
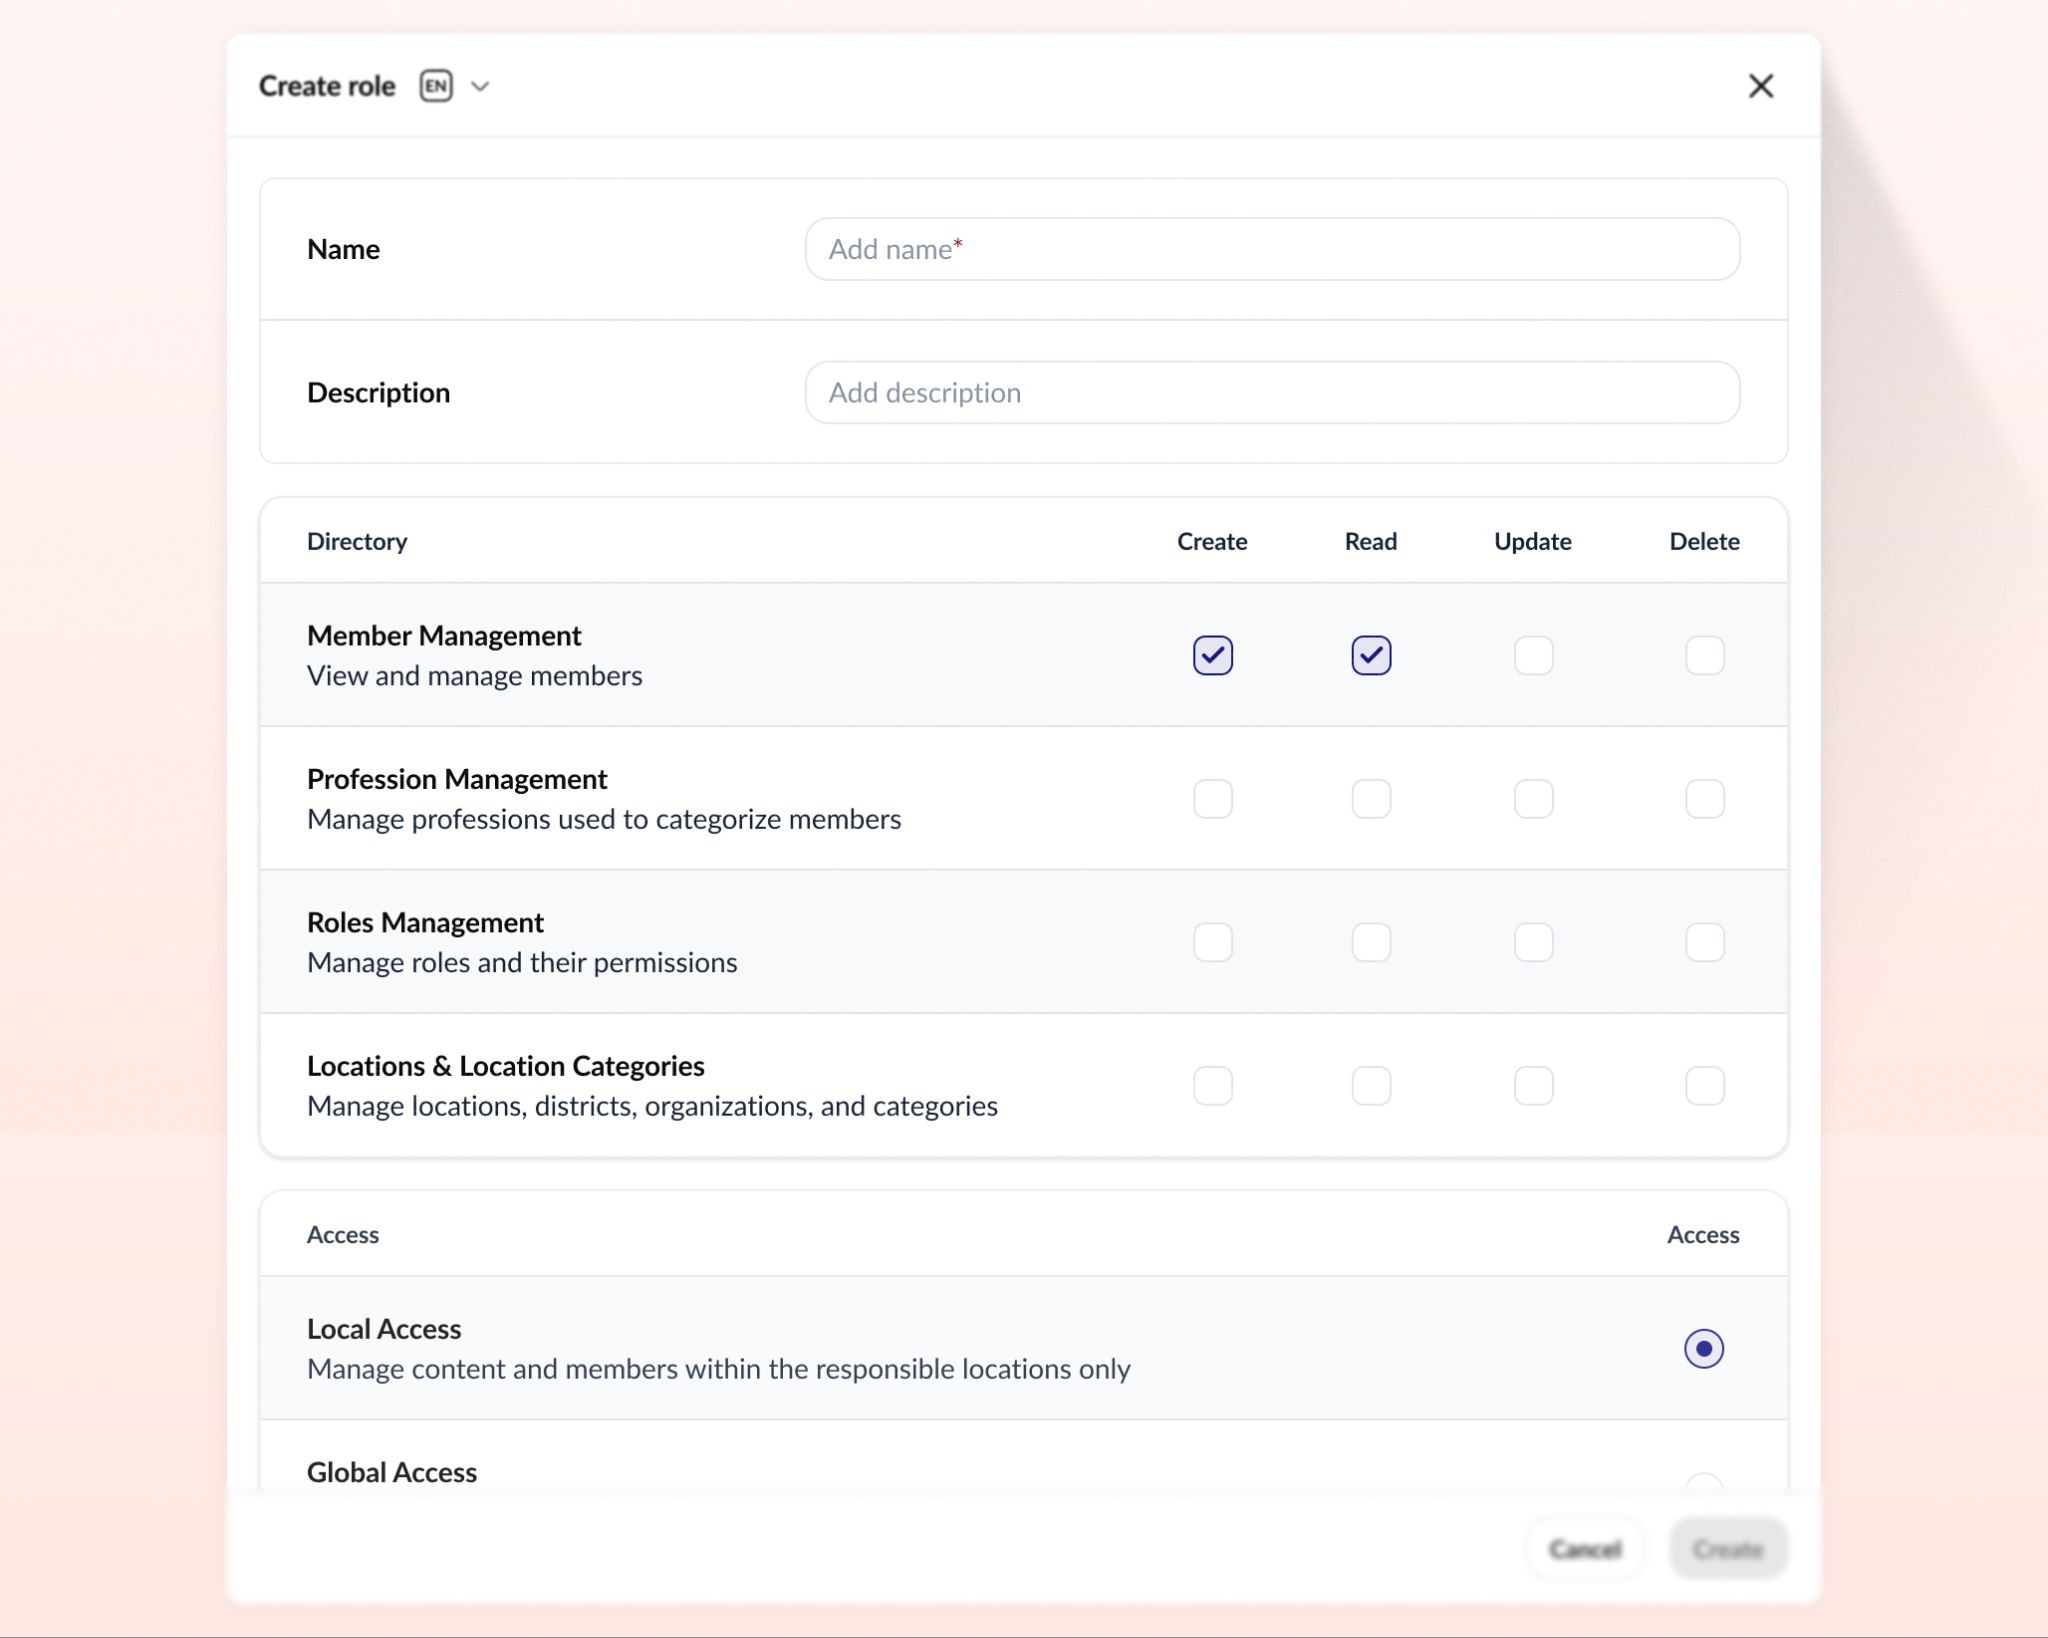
Roles allow you to control exactly what each user in your platform can see and do. Rather than configuring permissions per person, you define a role once and assign it to as many members as needed. Atobi comes with built-in system roles (such as System Owner and Regular Access) that cannot be modified or deleted, and you can create as many additional custom roles as your organisation requires.
Permissions are organised across these groups:
Directory — Create / Read / Update / Delete toggles
- Member Management — View and manage members
- Profession Management — Manage professions used to categorize members
- Roles Management — Manage roles and their permissions
- Locations & Location Categories — Manage locations, districts, organizations, and categories
Access — pick one
- Local Access — Manage content and members within the responsible locations only
- Global Access — Manage content and members across all locations
Content — Create / Read / Update / Delete toggles
- Article Studio — Create and manage articles
- Channel Studio — Create and manage channels
- Audiences — Create and manage audience segments for targeting content
- Content Categories — Manage topics used to categorize content
- Engagement Studio — Create and manage achievements and competitions
- Complaints — Review and resolve user reports and complaints
Feature — Access toggle only
- Dashboard Access — View analytics dashboards
- Store Dashboard — View store-level dashboard
- Chat Access — Send and receive messages in chat
- Atobi Connect Access — Share and receive content from external partners
Administration — Access toggle only
- System Owner — Full access to platform settings and all content
- Technical Contact — Receives technical support requests from Atobi
- Invoice Contact — Receives billing and invoice notifications
Additionally, if a member has Member Create permissions, you can use the Assignable Roles setting to control which roles that member is permitted to hand out to others when managing users.
7. Audiences
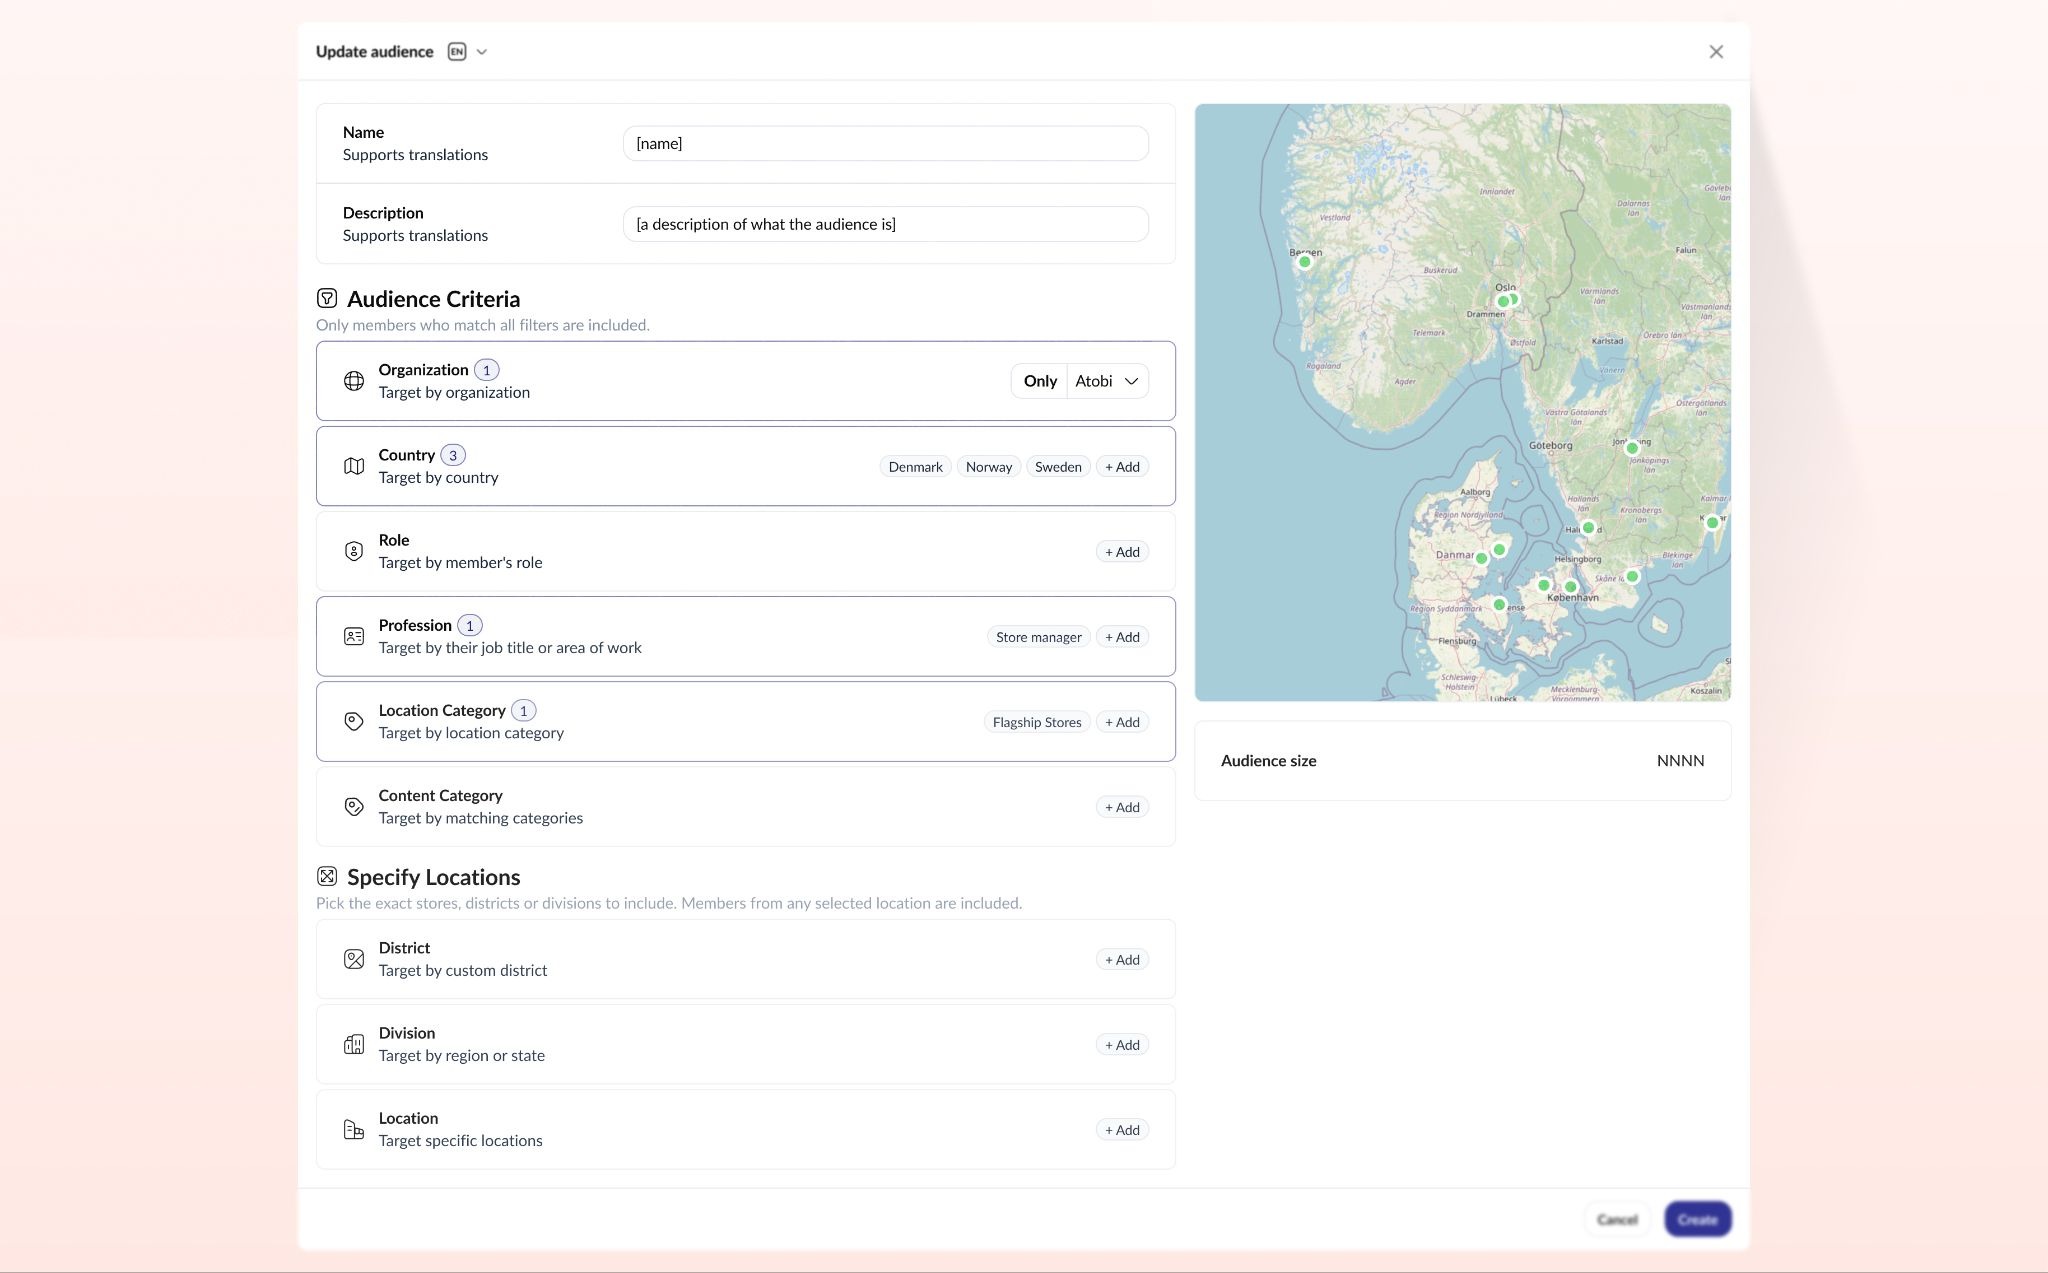
Audiences have also been significantly expanded. Previously, you could only build audiences based on member Professions and specific Locations. The new audience builder introduces a much richer set of criteria, split across two dimensions.
Under Audience Criteria, you can now filter members by Organization, Country, Role, Profession, Location Category, and Content Category — meaning you can target, for example, all members working in franchise locations of a given organization, or all members tagged with a specific content interest.
Under Specify Locations, you can narrow the audience further by District, Division, or specific Locations.
This makes it possible to build highly precise audiences without manual list management — and as your location structure and roles evolve, your audiences update automatically to reflect the changes.
What Do You Have To Do?
For now, nothing changes. We will reach out to agree on a migration date before anything is moved — you won't be switched over without a plan in place.
Once your migration date is set and confirmed, the main thing to be aware of is this: the old admin interface will no longer be where you manage your platform. All administrative tasks — managing members, locations, roles, and settings — will move to Platform Settings inside the Atobi web app. Any workflows or internal documentation you have that references the old admin should be updated to reflect the new location.
The good news is that everything you've already set up will still be there. Your existing roles, members, and locations will carry over, and you can continue using the platform exactly as you do today. The new features — organizations, districts, location enrichment, more flexible audiences, content categories, and the new roles system — are there when you're ready to explore them, but there's no obligation to adopt them immediately.
Our customer success team will be with you throughout. Whether you need help planning the transition, want to map your existing setup onto the new features, or are ready to unlock more of what the platform can do, we're here to guide you through it.